My client was very open to color combinations and options, so a lot of the sketches and beginning ideas I made included a lot of color. With the final logo he chose, I gave him for different options. He ended up liking them all and wanting to use them all in various things throughout the company. Below you can see the four different variations of the logo.
Friday, March 29, 2013
A Logo low-down: Fly N High Productions
I recently had the privilege to design the logo for a local music video production company called Fly N High productions. A KU student started the company and was looking to have a logo designed for it. I've slowly but surely been working on it for about a month now, and I'm really excited with how it turned out and it to share it with you. This logo was so much fun to design and while it went through many brainstorming periods, the client ended up just as happy with the logo and I am.
My client was very open to color combinations and options, so a lot of the sketches and beginning ideas I made included a lot of color. With the final logo he chose, I gave him for different options. He ended up liking them all and wanting to use them all in various things throughout the company. Below you can see the four different variations of the logo.
Monday, March 25, 2013
Design & Etc.
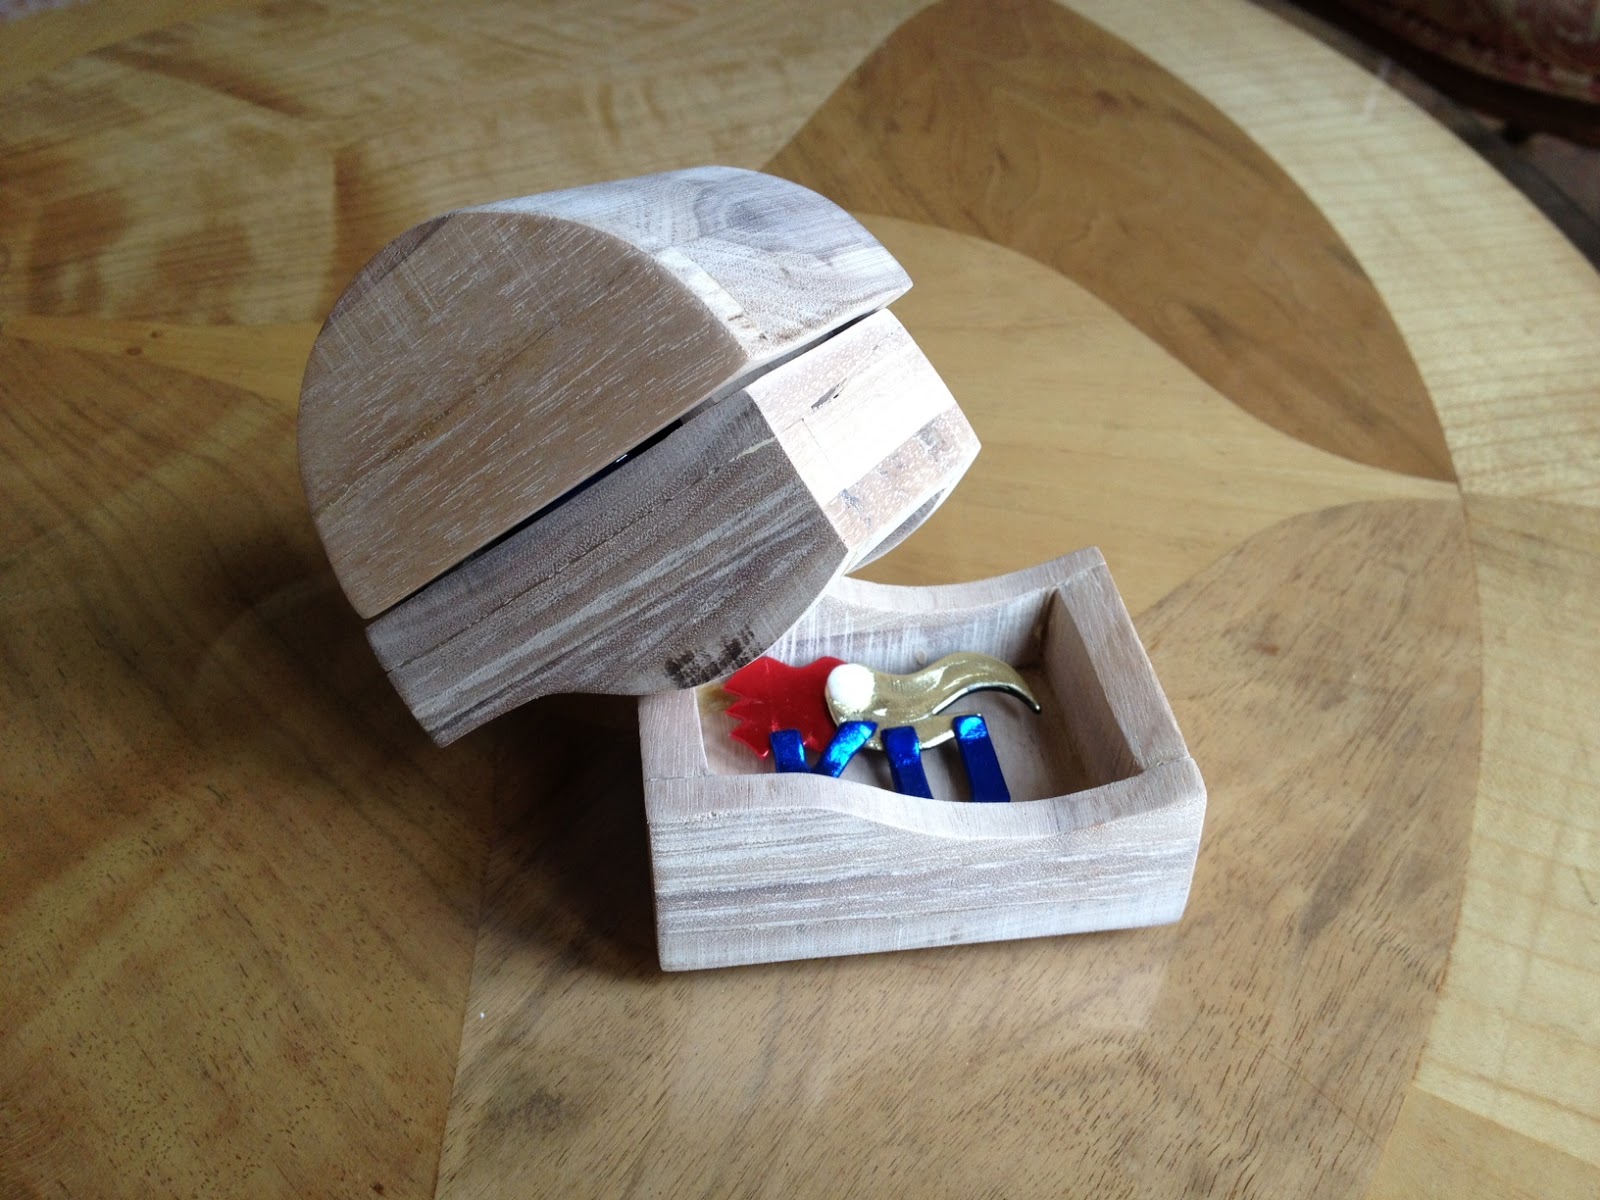
I realized after getting back from spring break that I never posted about my final box. The two weeks before spring break were a total whirlwind, without much sleep, so it must have just slipped by me. Here are some photos of the completed wooden box:
As I mentioned before, this box was created to hold KU jewelry my grandma had given me that she didn't want anymore. It was fun creating a box that had so much meaning to me, just because it holds items that my grandmother gave to me. I love that.
One of my more recent designs for Chi Omega was for a poster promoting our spring philanthropy for Make A Wish. We are hosting a sand volleyball tournament called "Hoot Set Spike".
I based the poster off of the tank top design I made, which includes the owl volley ball on it that you see top right of the poster. I'll post pictures of the tanks once they are ready to order.
Another design I'm really excited about is my v-neck shirt design for mom's weekend for Chi Omega:
Spring break went by way too fast, as I was in California, and coming back to the snow seemed way too harsh. I'm ready to finish the semester strong, and excited about design opportunities this summer. Stay tuned for more design and inspiration.
Wednesday, March 6, 2013
Back to the Drawing Board
Yesterday was one of those great days where I realized I had to re-do most of my project. Maybe wood shop isn't really my thing, because when I first cut out my box the top and bottom did not match up because I cut it wrong. I've learned a lot about the wood shop and the band saw, as I have no previous experience. So I'm looking at all of it as a learning opportunity. Because if there's one thing I've learned in BDS this year it's that failing isn't always a bad thing and I'll probably end up with a better result because of it. The photos below document my process of cutting out the foam core model with the band saw as well as some wood practice.
| I used some extra wood to practice using the bandsaw. |
| Practicing using the band saw with my foam core model. |
| Finished foam core model. Cut with the band saw & glued with spray glue. |
| The beginning of attempt #1: after gluing the wood together I cut it in half and then spray glued the "pattern" of my box on the wood to cut with the band saw. |
This wooden box is due next Tuesday, so tomorrow studio will consist of me attempting to finish cutting out the box and then I can sand my life away this weekend. Spring break can't come soon enough. :)
Tuesday, February 26, 2013
A Wooden Vessel
As soon as we turned in our photo project we started onto the next one, a wooden box. We were suppose to choose a small object that has special meaning to us to make a box for it to be held in. The box has to be 4 to 8 inches long or wide, so the object can't be very big in size and we have to bring it to studio every day. We've been sketching and designing with foam core to brainstorm options.
foam core brainstorming
We were told to stack the foam core and cut it as we would with the band saw when we were working with the actual wood. I had already narrowed down my item to a Jayhawk pin my grandma gave me out of my three options: Jayhawk pin, Chi Omega necklace, and my ring. Below you can see three of my foam core box ideas.
foam core brainstorming
We were told to stack the foam core and cut it as we would with the band saw when we were working with the actual wood. I had already narrowed down my item to a Jayhawk pin my grandma gave me out of my three options: Jayhawk pin, Chi Omega necklace, and my ring. Below you can see three of my foam core box ideas.
During class when I brought my three foam core ideas, a fellow classmate thought of placing my hill idea on top of my third box idea to create all one box.
With the snow days we have had canceling two of our studio days, we have been a little behind schedule. I have glued my wood together but I have yet to start cutting the wood and am still working on cutting out my foam core.
Tuesday, February 12, 2013
A New Opportunity
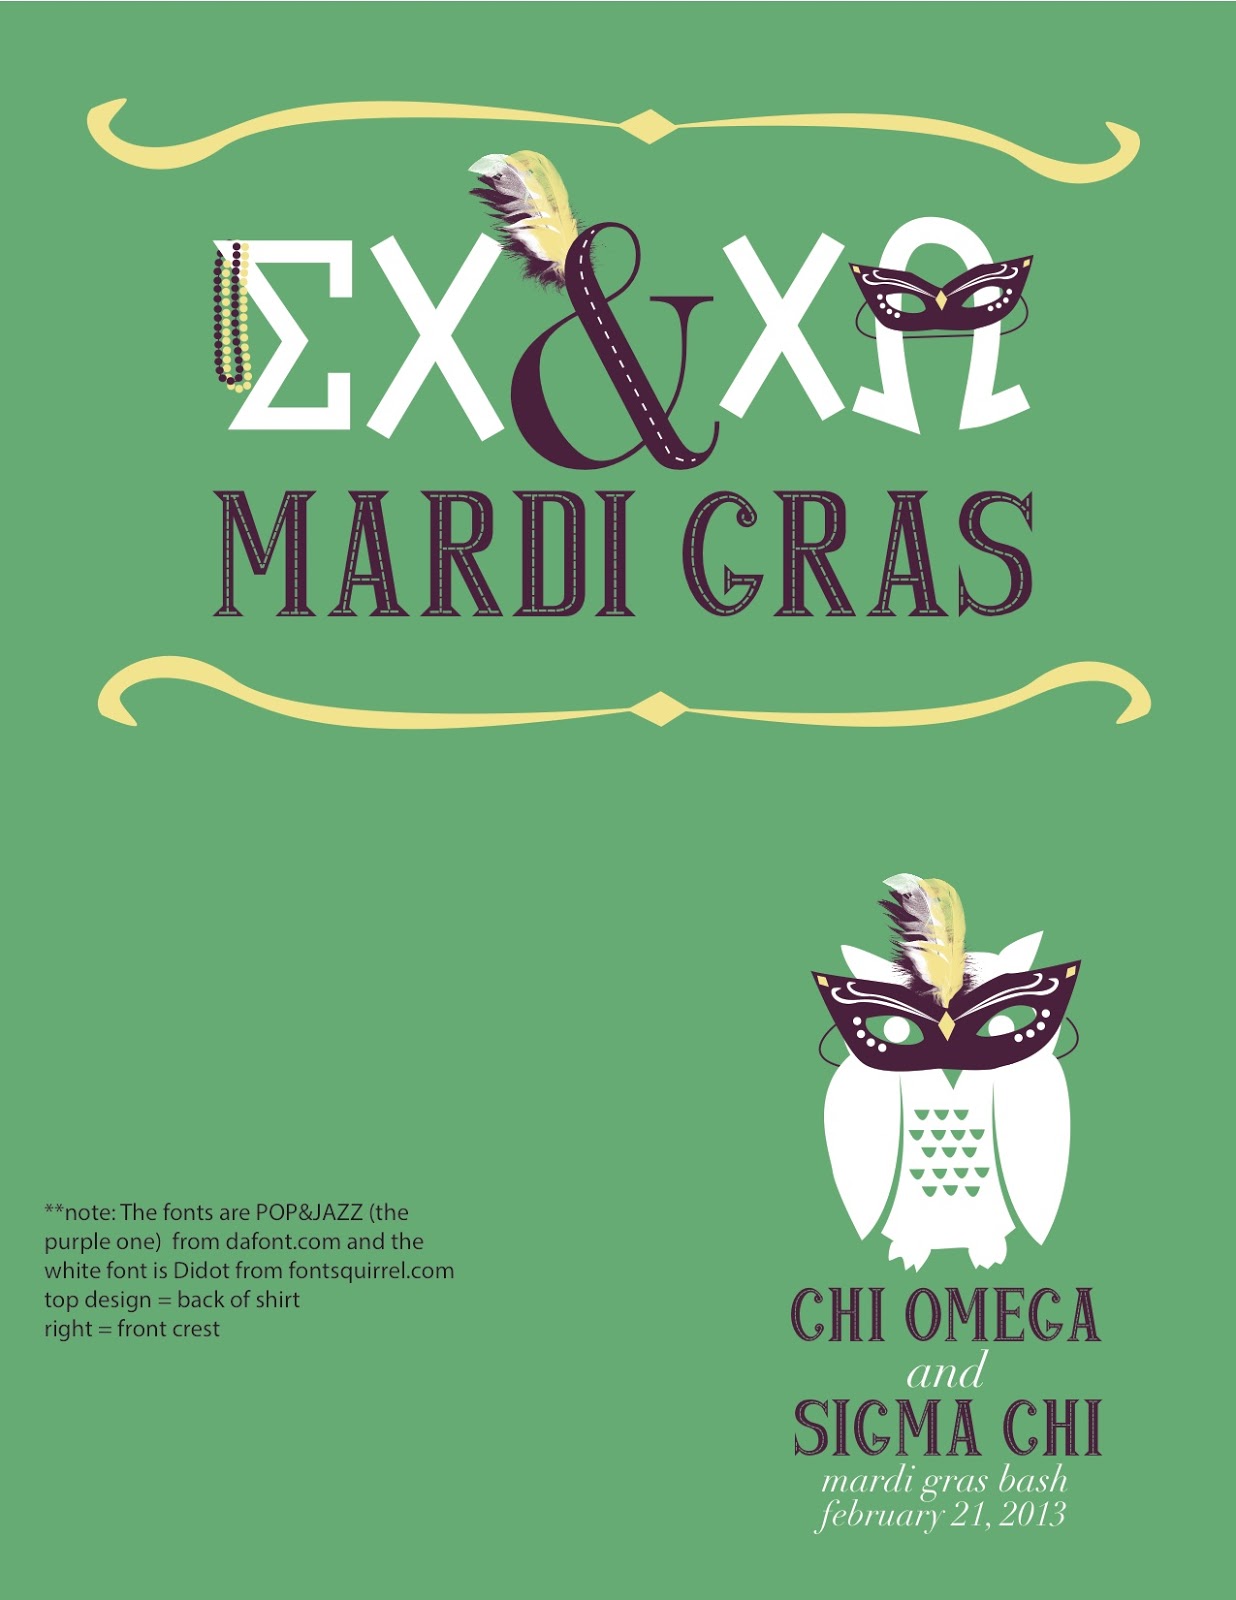
I am thrilled to be the new t-shirt designer for my sorority, Chi Omega. My first duty in this role was to design t-shirts for our upcoming crush date party and mardi gras themed party with a fraternity here on campus. I had designed them a week or so ago and the orders finally went out today, so I am very excited to share them with you. I think this position will be a great experience and I can't wait to see my designs on shirts! Below I have included the screen shot from the order form so you can see what it looks like on the shirt, but I'll also include an image of the PDF file so you can get a better look at the design. Please disregard the "note" section of the PDF files, they were just so the company knew what fonts to use.
![]() |
| // for our "Chi O Crush" date party: long sleeved salmon tee |
![]() |
| // we also made the design available in a half-zip gray sweatshirt |
![]() |
| // the second t-shirt, for our mardi gras themed party |
Thursday, February 7, 2013
A Photo Story
This morning in class I turned in my final photo collage mounted on foam core board and I am more than pleased with how my final critique went. I knew how much I loved the collage and the story behind it, but my teacher and fellow classmates could have easily disagreed.
// Behind the Collage
The idea for this work came from the reality of the busy college student. While I myself feel as I am continually balancing many different assignments, tests, e-mails, meals, etc. the same vibe definitely bounces through buildings on campus such as the library, Chi O, and probably any academic building on campus. College students lead busy lives, and this is exactly the idea I wanted to portray through the collage. The setting was in a study room at Chi Omega which luckily included a beautiful chandelier, window pan view, nice chairs, and my good friend Sarah was willing to pose for me whenever I needed to take photos. While it looks like Sarah is sitting at a large conference table, that is actually just an illusion through the collage. It's just a mid size circle study table, but the large one in the collage is one of my favorite parts of the work that I did not originally intend on. While I could go on for hours about different aspects of the collage, I'll leave the rest up to you and your imagination.
// Process Notebook
One of my favorite parts of every project is making the Process Notebook. Hence, why I'm a graphic design major. While it's very time consuming (perhaps a love/hate relationship... mostly love) I always enjoy the process. I've been experimenting with size in my process notebooks and with this one I wanted to mimic the size of Teen Vogue, as I have always been a fan of that convenient size (6.75" x 9"). Below I'll share a photo of the front cover and click it to download a PDF version of my approx. 30 page book. You won't regret it.
// Behind the Collage
The idea for this work came from the reality of the busy college student. While I myself feel as I am continually balancing many different assignments, tests, e-mails, meals, etc. the same vibe definitely bounces through buildings on campus such as the library, Chi O, and probably any academic building on campus. College students lead busy lives, and this is exactly the idea I wanted to portray through the collage. The setting was in a study room at Chi Omega which luckily included a beautiful chandelier, window pan view, nice chairs, and my good friend Sarah was willing to pose for me whenever I needed to take photos. While it looks like Sarah is sitting at a large conference table, that is actually just an illusion through the collage. It's just a mid size circle study table, but the large one in the collage is one of my favorite parts of the work that I did not originally intend on. While I could go on for hours about different aspects of the collage, I'll leave the rest up to you and your imagination.
// Process Notebook
One of my favorite parts of every project is making the Process Notebook. Hence, why I'm a graphic design major. While it's very time consuming (perhaps a love/hate relationship... mostly love) I always enjoy the process. I've been experimenting with size in my process notebooks and with this one I wanted to mimic the size of Teen Vogue, as I have always been a fan of that convenient size (6.75" x 9"). Below I'll share a photo of the front cover and click it to download a PDF version of my approx. 30 page book. You won't regret it.
Wednesday, February 6, 2013
Wednesday.
I can't believe I'm already done with my first project this semester, time is flying by. While I'm complete with the final photo collage & process notebook, first I want to take this post to show you more of the along the way process of creating the final collage.
| A little editing and rearranging went into the collage the next day during studio. |
| There are some slight differences from when I had it collaged the night before such as the table and Sarah's arms which some were moved to accent the table. |
| Double sided sticky tape was used to mount the photos. |
| I used my x-acto knife to trim around the edges. |
| And there it is! The final collage. |
I'm also really excited about my process notebook so I'll share that in a later post. A big thanks to Sarah Morris for modeling for this project. She was so chill about it and always was ready to model for me whenever I needed her! I am really happy with how this project turned out.
And finally, a quote for inspiration.
"That's what great artists do. That's what great people do. They ask it. They say it. They express it. They out in words what so many others are thinking and feeling and wondering. They affirm that you aren't the only one having this experience." [Rob Bell]
Subscribe to:
Posts (Atom)